Creating a Transport Layer Security Connection between Vodia and Telnyx
Published on:
June 30, 2023
This comprehensive guide outlines the setup of a secure Transport Layer Security (TLS) connection between Vodia and Telnyx, emphasizing the crucial aspects of data confidentiality and integrity. By following the steps provided, users can establish a secure SIP trunk connection. This TLS connection guarantees encrypted and secure communication, enhancing data protection and privacy for your business.
In this blog we guide you through the process of setting up a TLS connection between Vodia and Telnyx. Transport Layer Security (TLS) provides secure communication over the Internet, ensuring the confidentiality and integrity of data exchanged between the two systems; by following the stops below, you can establish a secure connection for your SIP trunk.
Connecting with Telnyx
Create a SIP registration connection in Telnyx.
Step 1: Connecting with Telnyx
Create a SIP registration connection in Telnyx.
Choose "Registration" as the type, then copy your SIP password.
The SIP password will be required when setting up the SIP trunk on the Vodia phone system.
Save and finish the registration.
Edit the connection and enable Secure Real-Time Transport Protocol (SRTP) under "Encrypted Media."
Save the configuration.
Note: Outbound settings already utilize SRTP settings from the inbound settings.
Step 2: Configuring the Vodia Phone System
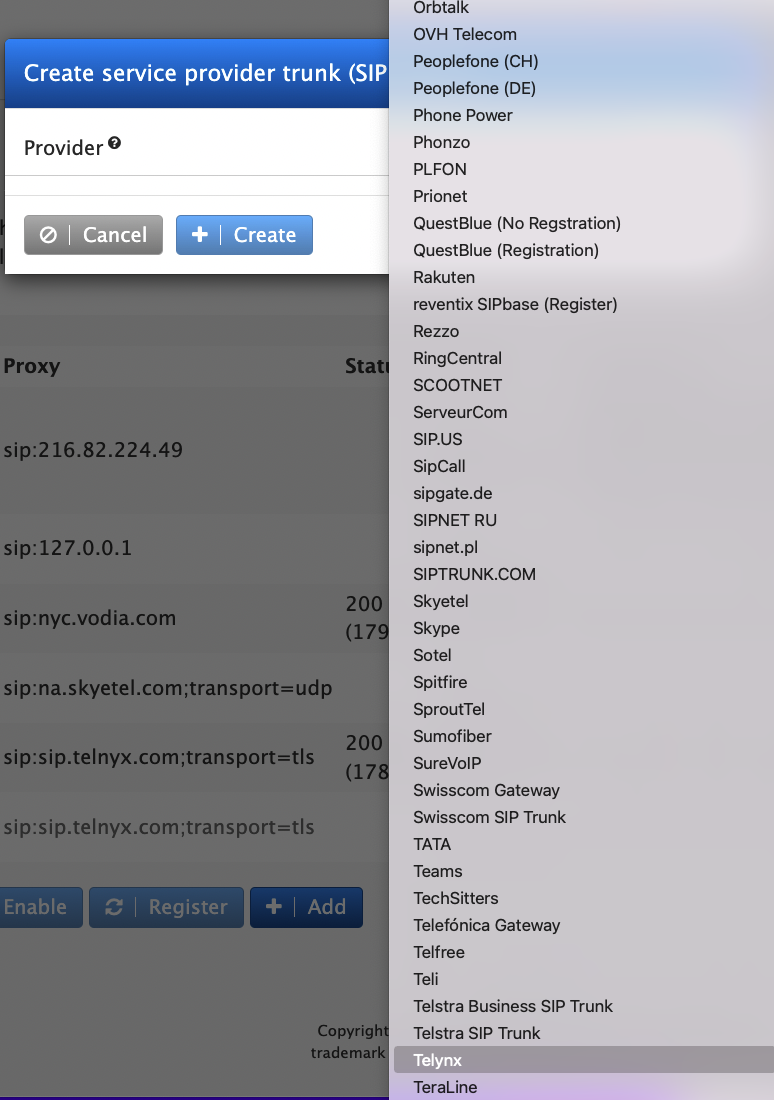
Navigate to the SIP trunk to create your Telnyx connection in the Vodia phone system.
Click on "Add" and select "Telnyx."
Enter your Telnyx SIP account details: • Name: Provide a name for your trunk. • Password: Enter your Telnyx SIP credentials. • User: Enter your Telnyx user account. • DID: If applicable, enter your Direct Inward Dialing (DID) number. • Save the configuration.
Configure TLS under "Proxy Address" by using the following example: • Proxy Address: sip:sip.telnyx.com;transport=tls
Navigate to the SIP trunk to create your Telnyx connection: Click on “Add” and select "Telnyx."
Configure the TLS under "Proxy Address" by using the following example:
Proxy Address: sip:sip.telnyx.com;transport=tls
Step 3: Caller ID and Phone Numbers
To define the Caller ID used when making calls from the Vodia system, follow these steps:
Define the FROM headers and Remote Party ID under the SIP caller-ID presentation: • Choose "custom headers" from your Telnyx SIP trunk. • You can set up the Domain ANI in the Tenant general settings under "dom_settings.htm." • Alternatively, you can set up an ANI on the extension and instruct the header to use "Extension ANI."
By following the above steps, you can establish a TLS connection between Vodia and Telnyx, ensuring secure and encrypted communication for your SIP trunk; this added layer of security helps protect your data and ensures the privacy of your calls. Implementing TLS is a crucial step in maintaining a secure communication infrastructure for your business.
At Vodia, we recognize the inherent challenges facing enterprise VoIP, particularly in maintaining high-quality audio connections amidst factors like jitter, network latency, and packet loss. These issues disrupt the seamless communication experience essential for business operations. To address these challenges, we've developed innovative solutions within our PBX, such as recording decrypted RTP packets and offering flexible options for data privacy. Our commitment lies in resolving these obstacles efficiently, ensuring businesses can rely on uninterrupted communication without compromising on security or performance.
Unlock the power of multilingual communication with Vodia's Cloud Phone System, supporting up to 18 languages for transcription and translation. Our global commitment to innovation ensures accessibility to our feature-rich PBX worldwide. Using AI language models, Vodia enables speech-to-text and text-to-speech conversion in 18 languages. Seamlessly integrate languages like Arabic, Spanish, and Japanese into your Vodia PBX. Enhance customer service, streamline call handling and expand your global reach with our multi-language capabilities.
Vodia recently released version 69.2.4, the latest update to their industry-leading cloud phone system. This update boasts a completely rebuilt frontend, providing a modern user experience, and integrates seamlessly with nearly any browser-based platform. A key feature is integration with Grafana, a powerful tool that enables comprehensive monitoring of Vodia instances across various platforms. Version 69.2.4 also brings several other improvements, including the ability to add custom notes to accounts, sending CDR emails for regular extensions, and enhanced support for Mitel 68xx and 69xx series phones.
.svg)


.png)


